Getting started
Evidence Wipe finds the personal data your Windows PC keeps about you - browsing traces, Windows history, sensitive documents and deleted files - shows you exactly what it found, and erases it so it can't be recovered.
What you need
- A PC with Windows 10 (version 1809 or later) or Windows 11, 64-bit.
- About 250 MB of free space for the program.
- Your Installation Key from your purchase email, in the format
XXXX-XXXX-XXXX-XXXX. You can scan, preview and find sensitive files without one; erasing needs an activated key.
Install
- Run EvidenceWipe-10.26-Setup.exe. If Windows shows "Windows protected your PC", click More info then Run anyway.
- Click Next, Install and Finish. Evidence Wipe starts with its splash screen.
- The first time, Evidence Wipe offers to scan your PC. Click Scan now - nothing is erased until you've seen the preview and chosen Clean.
A quick tour of the window
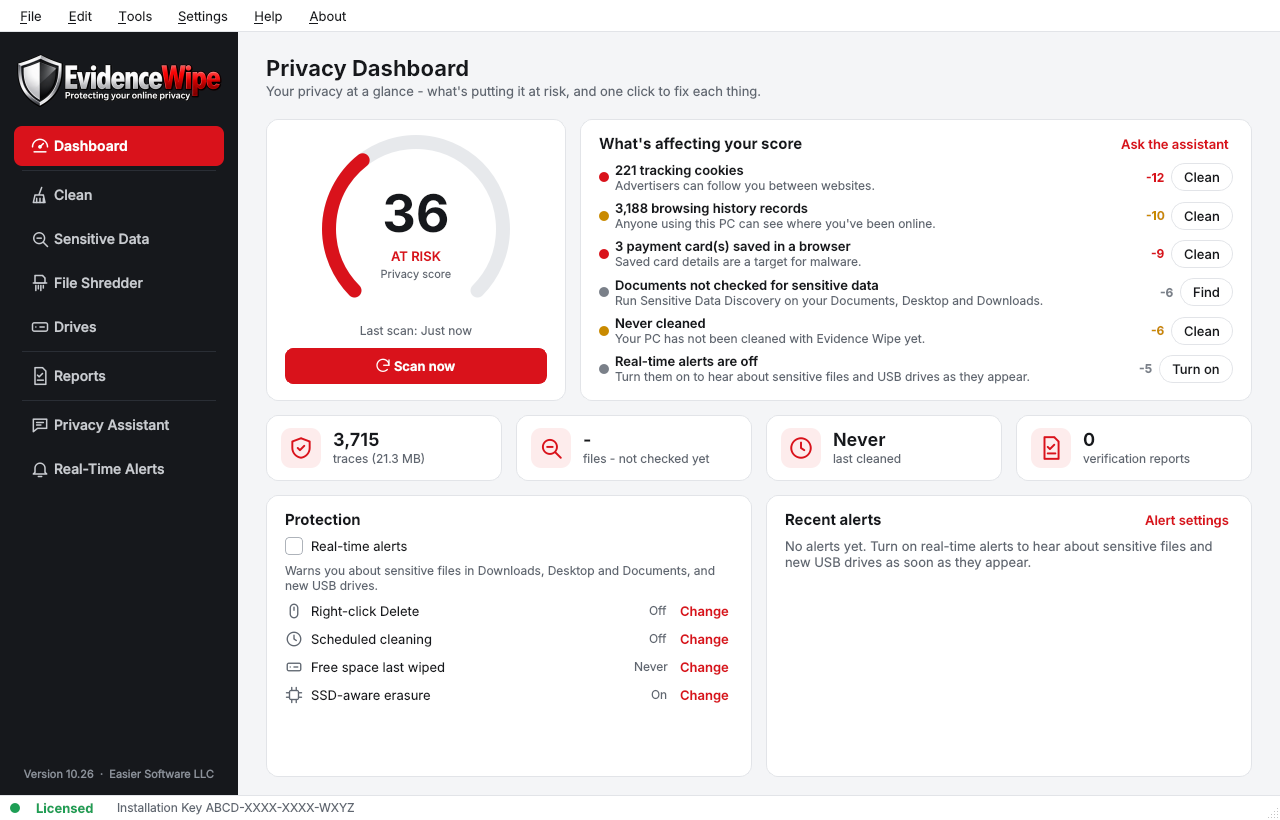
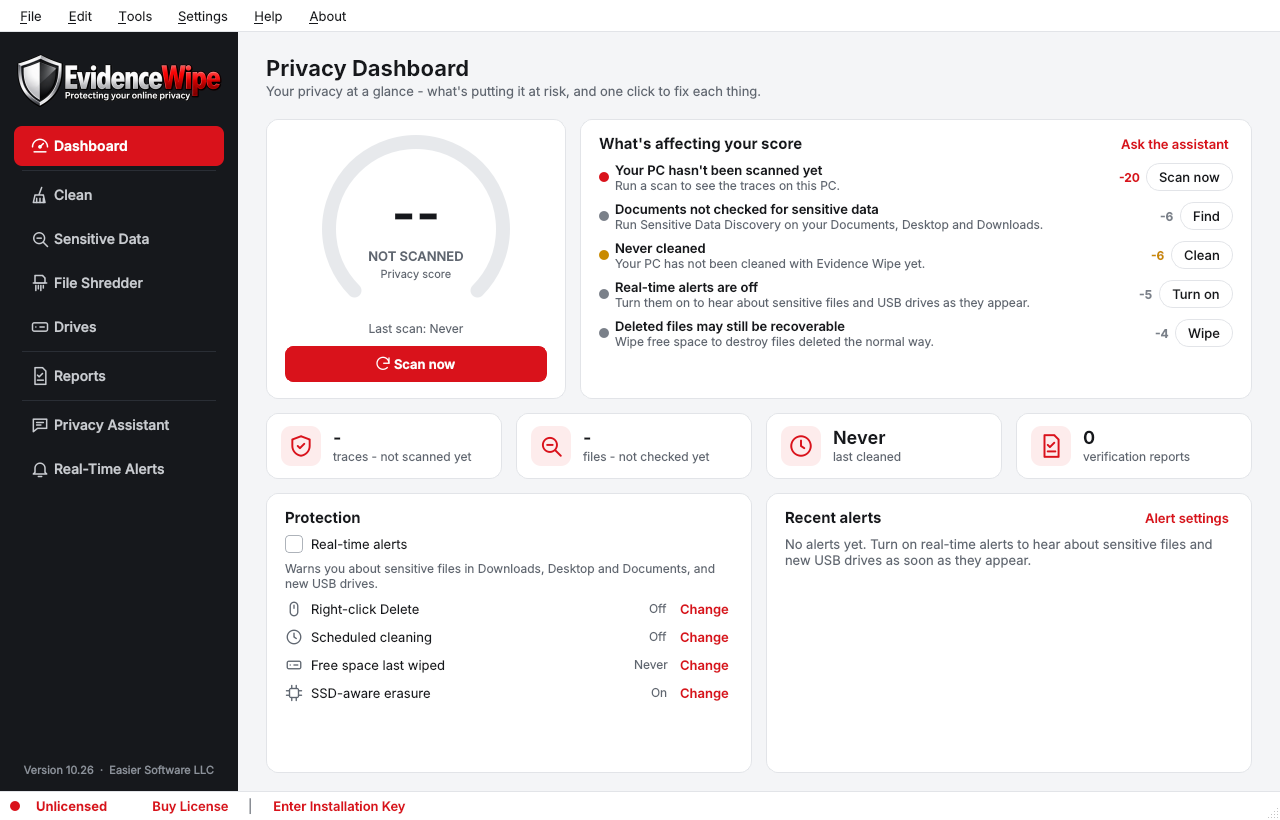
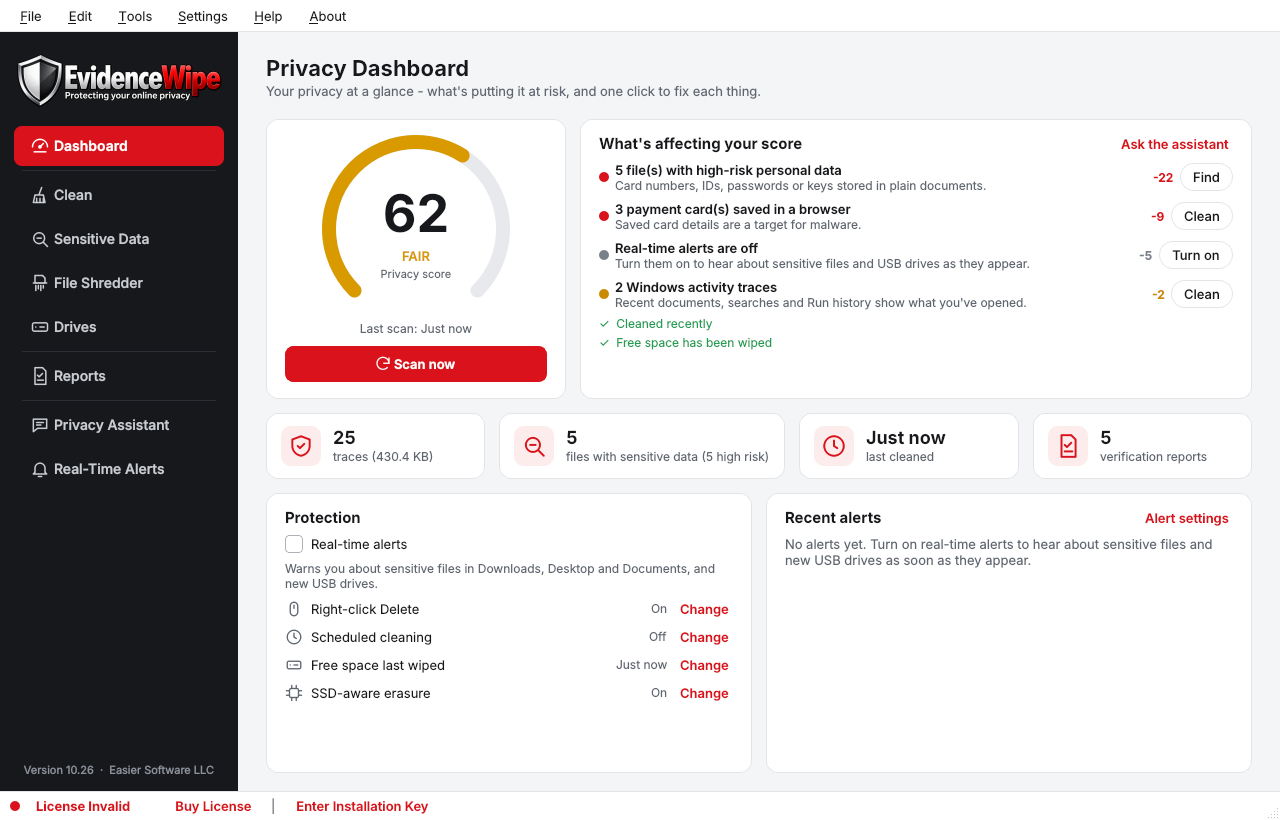
- 1Sidebar - Dashboard, Clean, Sensitive Data, File Shredder, Drives, Reports, Privacy Assistant and Real-Time Alerts.
- 2Privacy score - 0 to 100, with the grade. Scan now refreshes it.
- 3What's affecting your score - every deduction with a button that fixes it.
- 4Totals - traces found, files with sensitive data, when you last cleaned, how many reports you have.
- 5Protection - real-time alerts, Right-Click Delete, scheduled cleaning, free space and SSD-aware erasure at a glance.
- 6License status - bottom-left: Licensed, or Unlicensed / License Invalid with Buy License and Enter Installation Key.
Privacy Dashboard
The dashboard turns everything Evidence Wipe knows into one privacy score from 0 to 100: Excellent (85+), Good (70+), Fair (50+) or At risk.
The score starts at 100 and loses points for each risk - tracking cookies, browsing history, payment cards saved in browsers, sensitive documents, files in the Recycle Bin, sensitive text on the clipboard, files in cloud-synced folders, protection that's switched off, and time since your last clean. Each one is listed under What's affecting your score with the points it costs and a button (Clean, Find, Wipe, Turn on) that takes you straight to the fix.
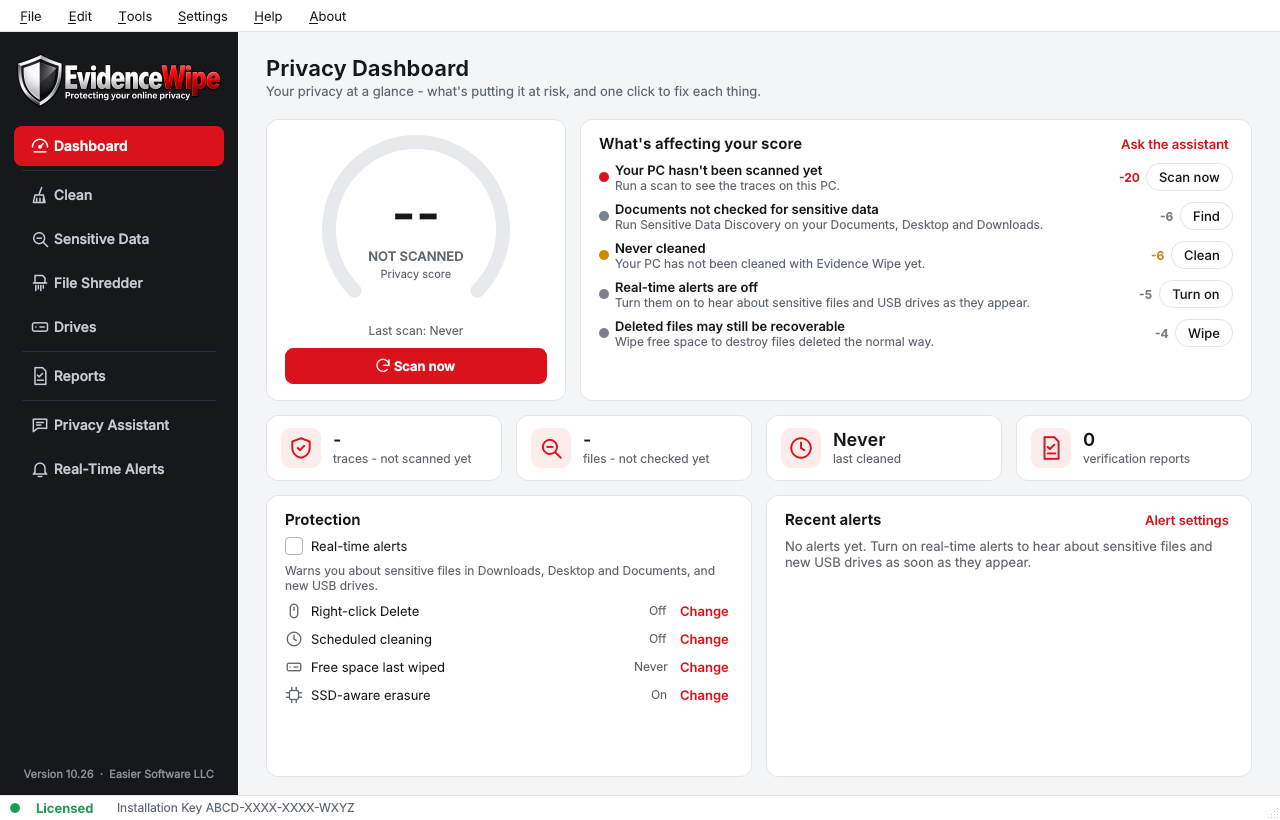
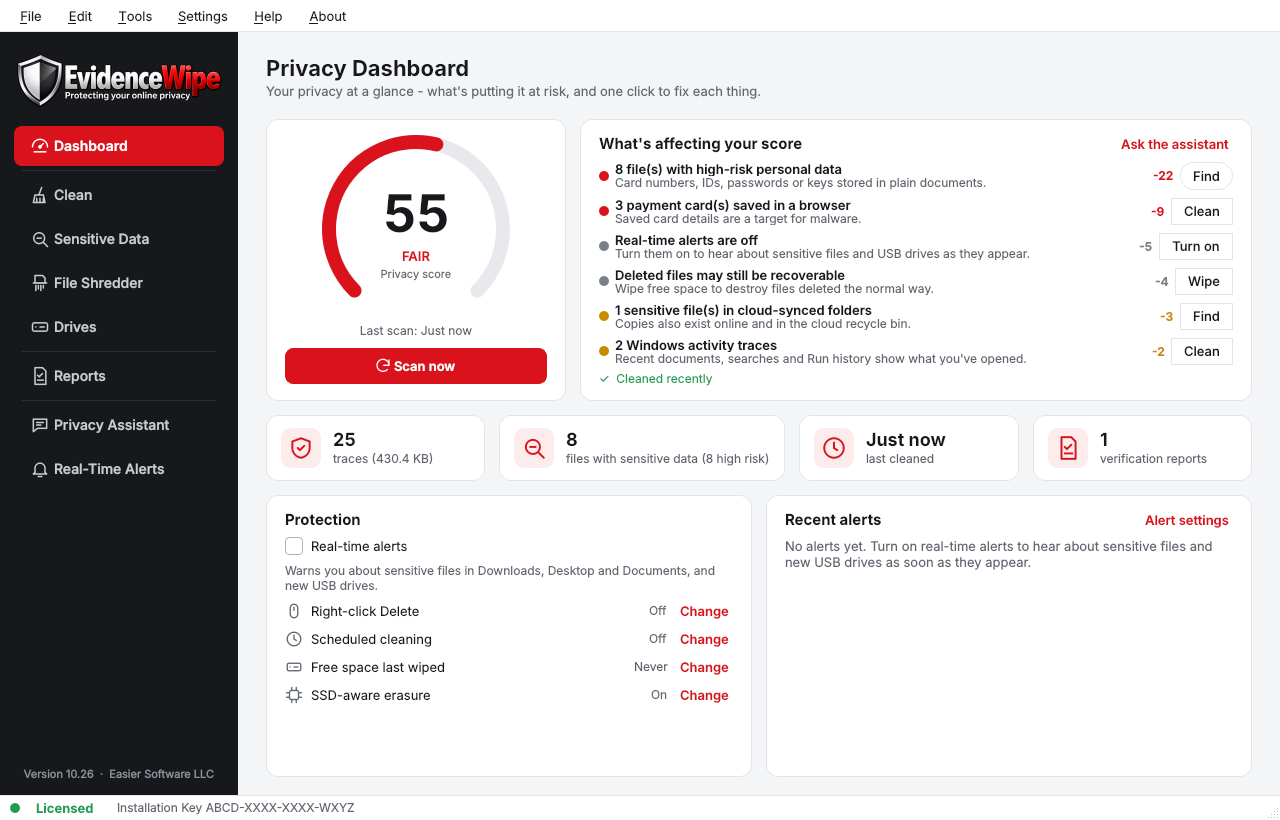
Not sure where to start? Click Ask the assistant - it turns the list into a short to-do list in plain English.
Scanning and cleaning
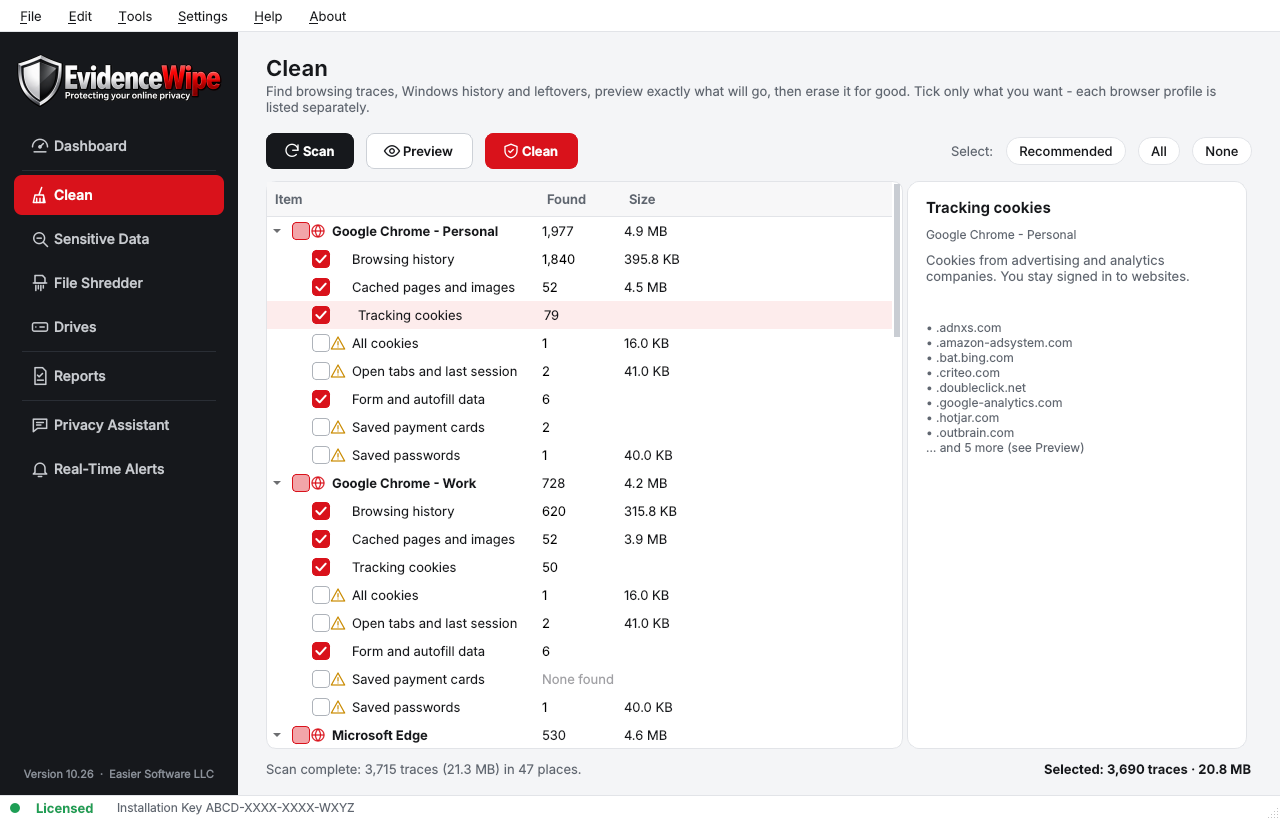
The Clean page finds browsing traces, Windows history and leftovers, lets you choose exactly what goes, and erases it securely.
- Click Scan (or press F5). Evidence Wipe looks through every browser profile, Windows' history, the Recycle Bin, temporary files and more. Scanning never changes anything.
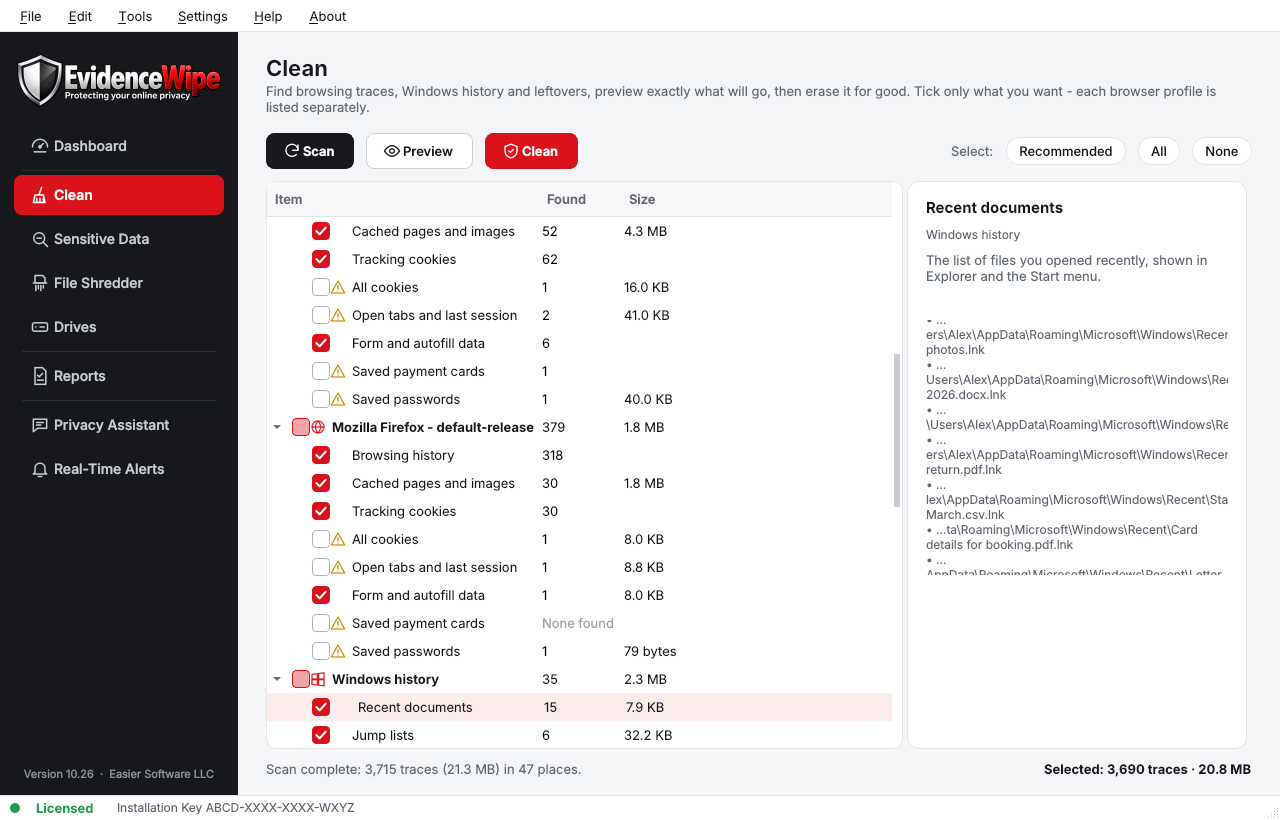
- Each line shows how many traces it found and how much space they use. Click a line to see what it is and a sample of what was found.
- Tick what you want to erase. Recommended ticks the safe choices; All and None do what they say. Evidence Wipe remembers your ticks.
- Click Clean. The Cleaning Preview opens - check it, then click Clean now.
What Evidence Wipe can clean
| Group | Items |
|---|---|
| Each browser profile | Browsing history, cached pages and images, tracking cookies, all cookies, open tabs and last session, form and autofill data, saved payment cards, saved passwords. Chrome, Edge, Brave, Vivaldi, Opera / Opera GX, Firefox, Internet Explorer and Safari for Windows. |
| Windows history | Recent documents, jump lists, Run history, File Explorer search history and typed addresses, Open and Save dialog history, network drive history, thumbnail cache, program usage records, Activity history. |
| Recent media and documents | Microsoft Office recent files, Media Player, Paint and WordPad, Adobe Acrobat Reader. |
| System | Recycle Bin (shown with the original file names), temporary files, clipboard, DNS cache, error reports. Windows temp files, memory dumps and Prefetch need Evidence Wipe to be run as administrator. |
| Applications | Microsoft Teams, Zoom, Discord and Java caches. |
Items with a yellow warning sign have a side effect - for example All cookies signs you out of websites, and Saved passwords removes passwords your browser remembers. They're never ticked by Recommended.
Browsers must be closed
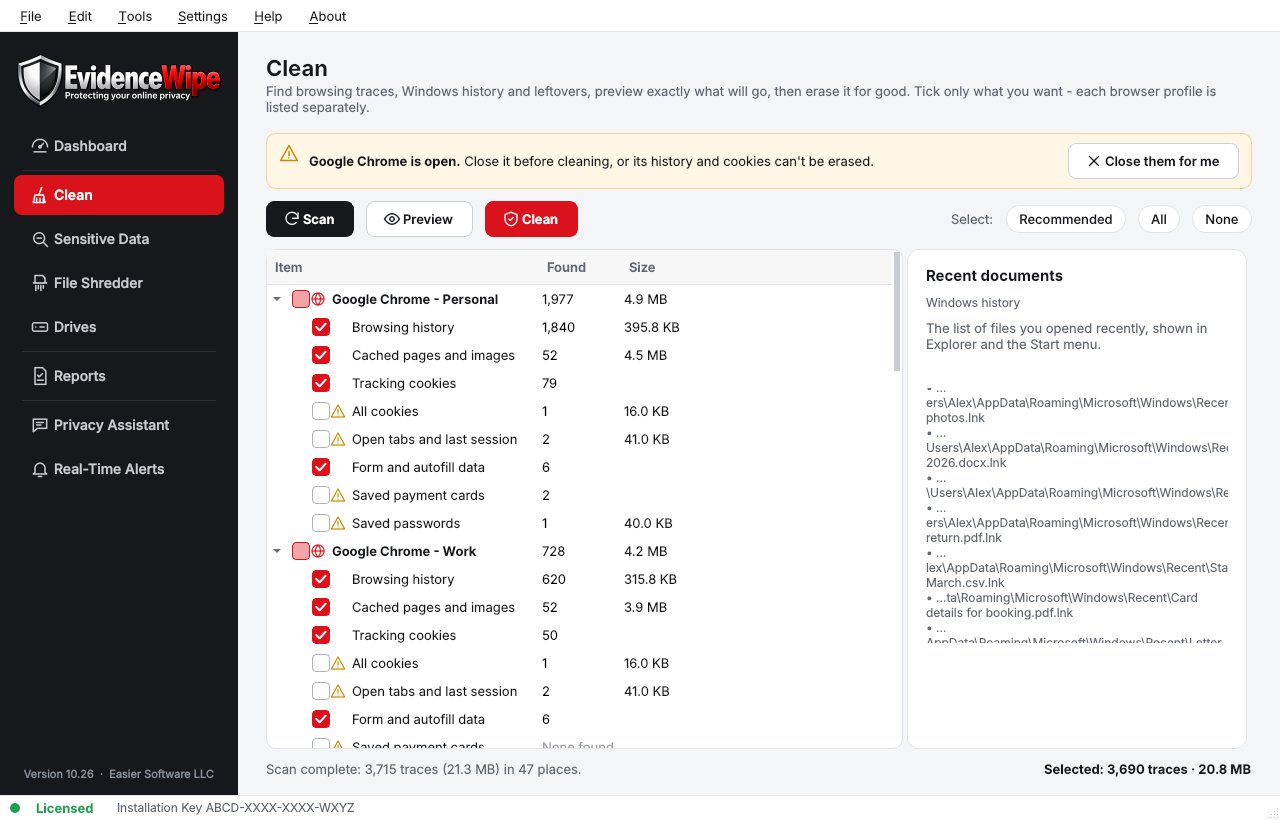
An open browser locks its history and cookie files. If one is open, a yellow banner names it. Close it yourself or click Close them for me. If you clean anyway, items from open browsers are skipped and everything else is cleaned.
When cleaning finishes
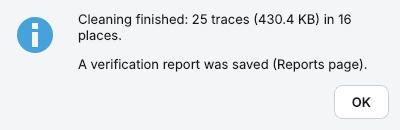
You see how many traces were erased and how much data was overwritten. A verification report is saved automatically, and the scan runs again so you can see what's left.
Cleaning Preview
Before anything is erased, the Cleaning Preview shows exactly what will go - nothing has been changed yet.
- Totals at the top: how many traces, how much data, how many categories, and the erasure method.
- Kept - what is deliberately left alone, such as saved passwords (unless ticked), sign-in cookies, bookmarks, browser settings and search engines.
- Heads up - side effects of anything you ticked, and a warning if items are in a cloud-synced folder.
- The list, grouped by browser profile and category: every website, cookie domain, file (with its size) and Windows record.
- Search the preview - type a site, file or folder name to find it.
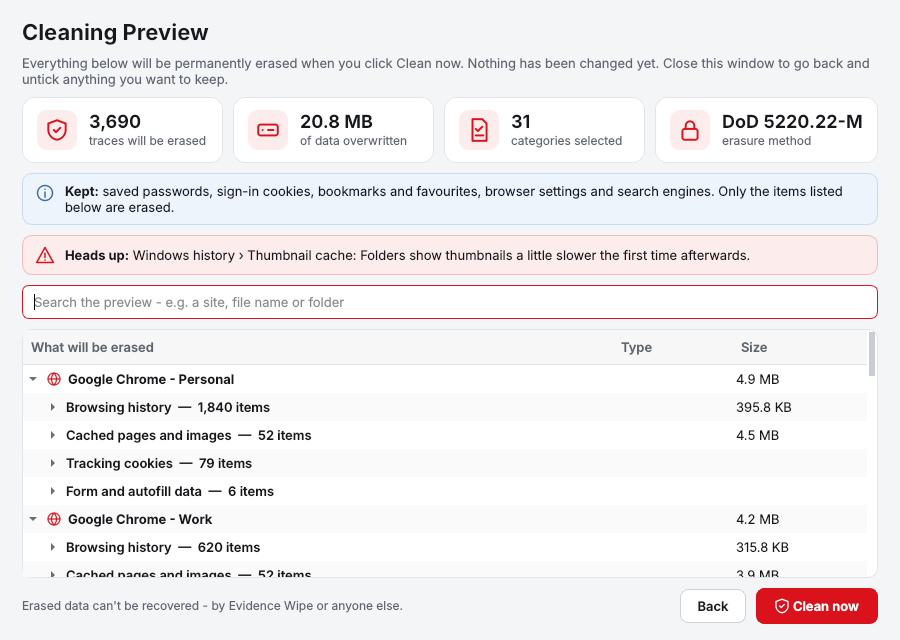
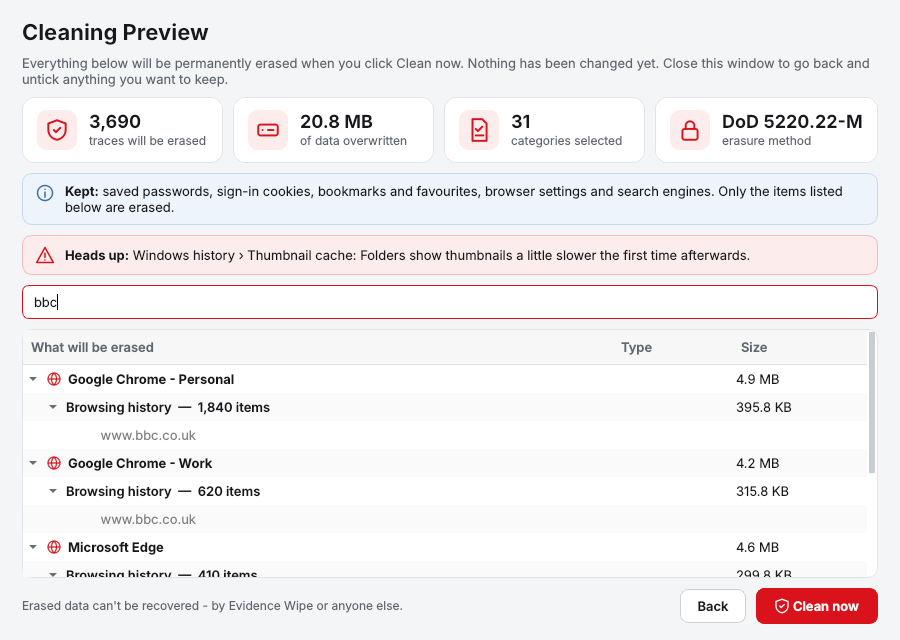
Click Clean now to erase everything listed, or Back to change your ticks. You can also open the preview at any time with File › Cleaning Preview... (Ctrl+P).
Sensitive Data Discovery
Sensitive Data looks inside your documents for information that shouldn't be lying around:
| Looks for | How it checks |
|---|---|
| Card numbers | The number must pass the card checksum (Luhn) and match a real card network. |
| Bank account numbers (IBAN) | Country length and the IBAN check digits. |
| UK National Insurance and US Social Security numbers | The official number formats. |
| Passport numbers, passwords written in documents, private keys, API keys and access tokens | Known formats and the words around them. |
| Email addresses and phone numbers | Reported only alongside something more sensitive. |
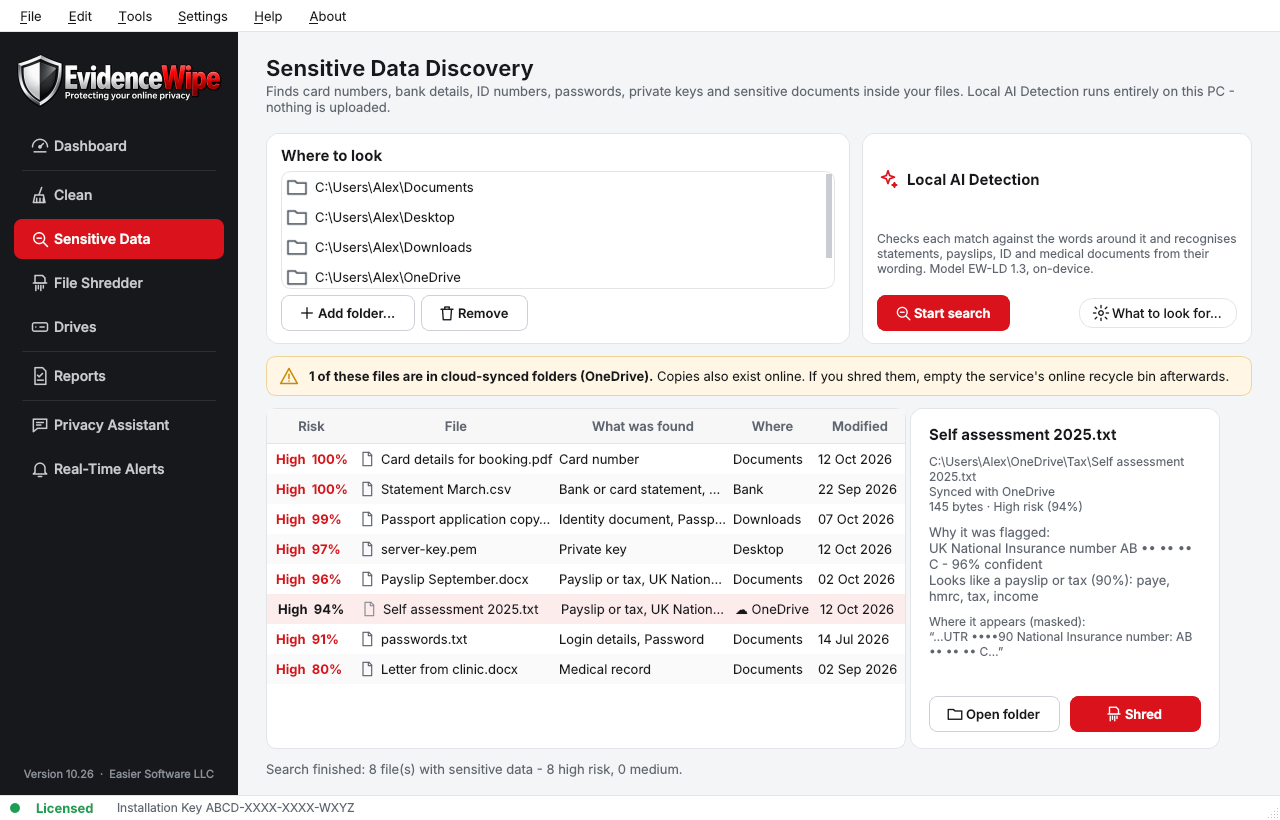
It reads text, CSV, Word, Excel, PowerPoint, OpenDocument, PDF, email, web pages, configuration files and more. By default it searches Documents, Desktop, Downloads and your cloud-synced folders; add any folder or drive with Add folder....
- Check the folders under Where to look.
- Click Start search (Ctrl+F). Files appear as they're found; Stop ends the search early.
- Click a result to see why it was flagged - values are always shown masked (for example
•••• •••• •••• 1111). - Open folder shows the file in File Explorer. Shred erases the selected files securely.
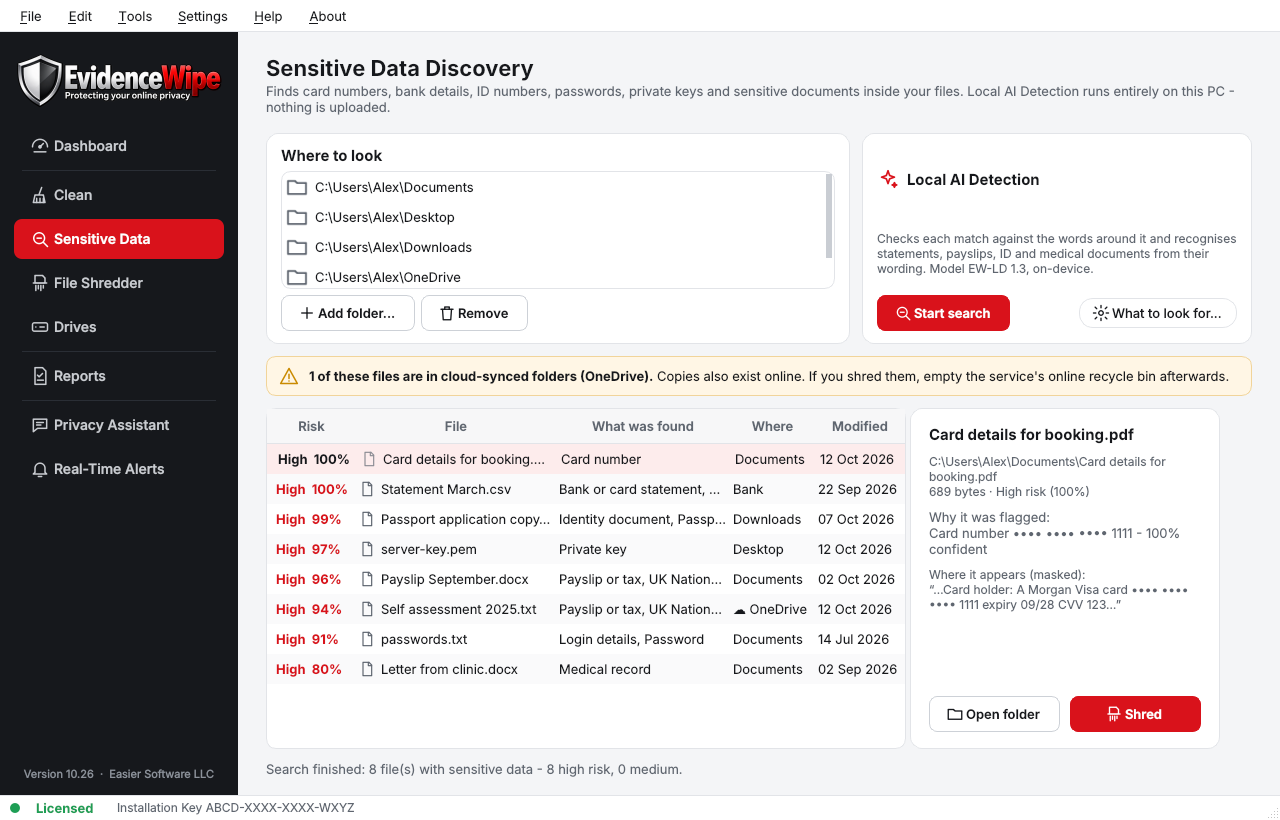
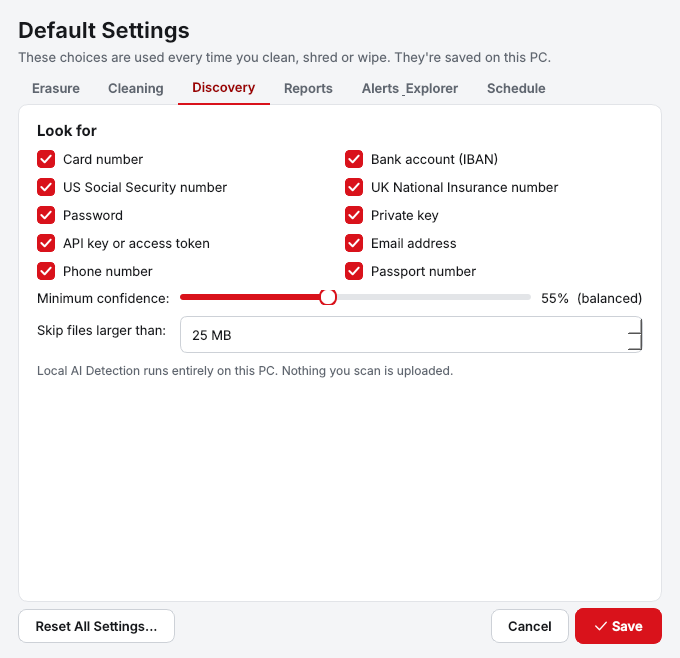
Full numbers are never displayed, logged or saved in reports. Very large files (over 25 MB by default) and online-only cloud files are skipped. Change what's searched for in Settings › Discovery.
Local AI Detection
A 16-digit number isn't always a card number. Evidence Wipe's Local AI Detection is a small model that runs entirely on your PC - nothing you scan is uploaded, and it works offline.
- It reads the words around each match. "Expiry", "CVV" or "card holder" make a card number more likely; "order number", "tracking" or "ISBN" make it less likely. Numbers repeated hundreds of times (log files, exports) count for less.
- It recognises the kind of document from its wording - bank or card statements, identity documents, medical records, payslips and tax documents, legal documents and login lists - so it can flag a medical letter even when there's no number in it.
- It explains itself. Every result shows its confidence and the reasons, for example "Looks like a medical record (100%): patient, diagnosis, prescription".
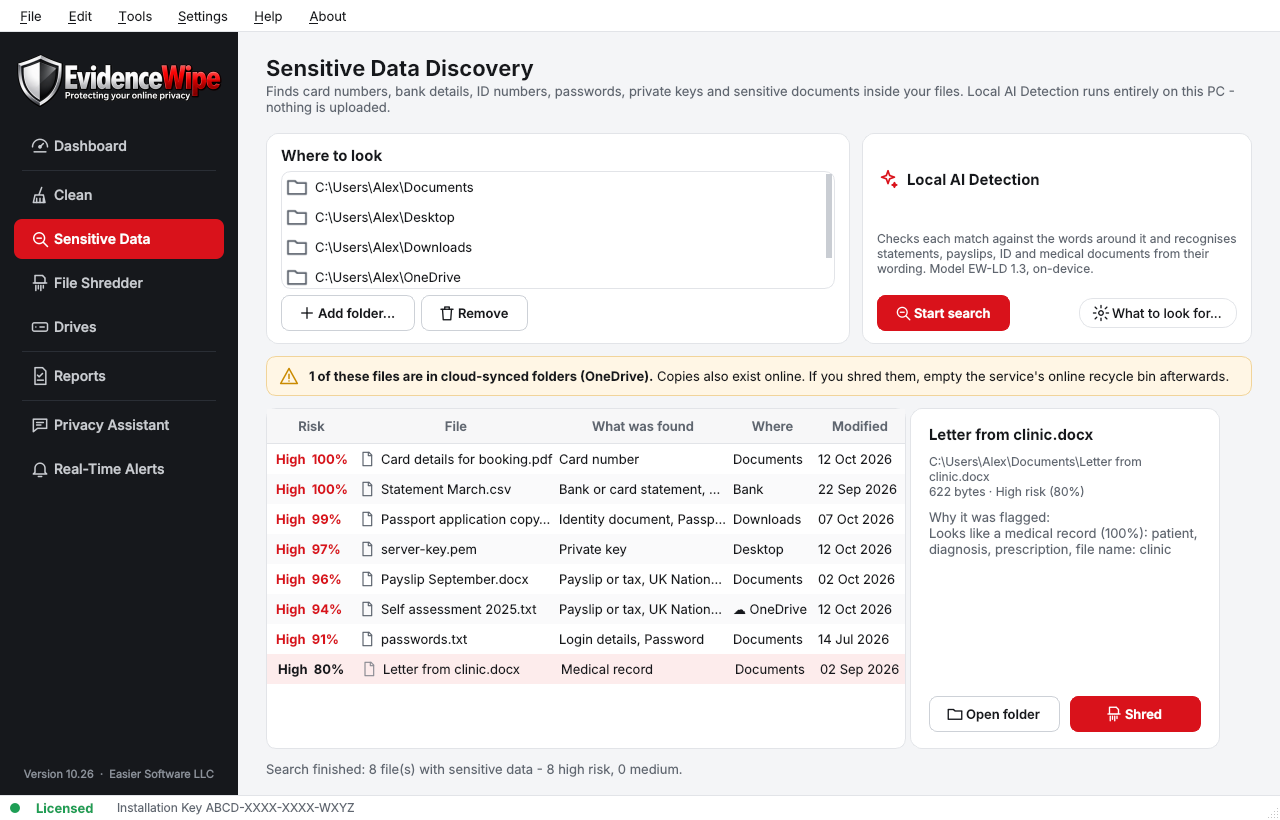
Each file gets a High (75%+), Medium (50%+) or Low risk score. The Minimum confidence slider in Settings › Discovery controls how sure the model must be before a file is listed.
File Shredder
The File Shredder erases files and folders so they can't be recovered. Each file is overwritten using your erasure method, the last pass is read back to verify it, the file is renamed several times so its name doesn't linger, and then it's removed. On SSDs, SSD-aware erasure applies.
- Drag files and folders onto the shredder, or use Add files... / Add folder... (also File › Shred Files..., Ctrl+O).
- Check the list - it shows each item's size and whether it's on an SSD, a hard drive or in a cloud-synced folder.
- Click Shred. Tick I understand these items will be erased permanently and click Erase permanently.
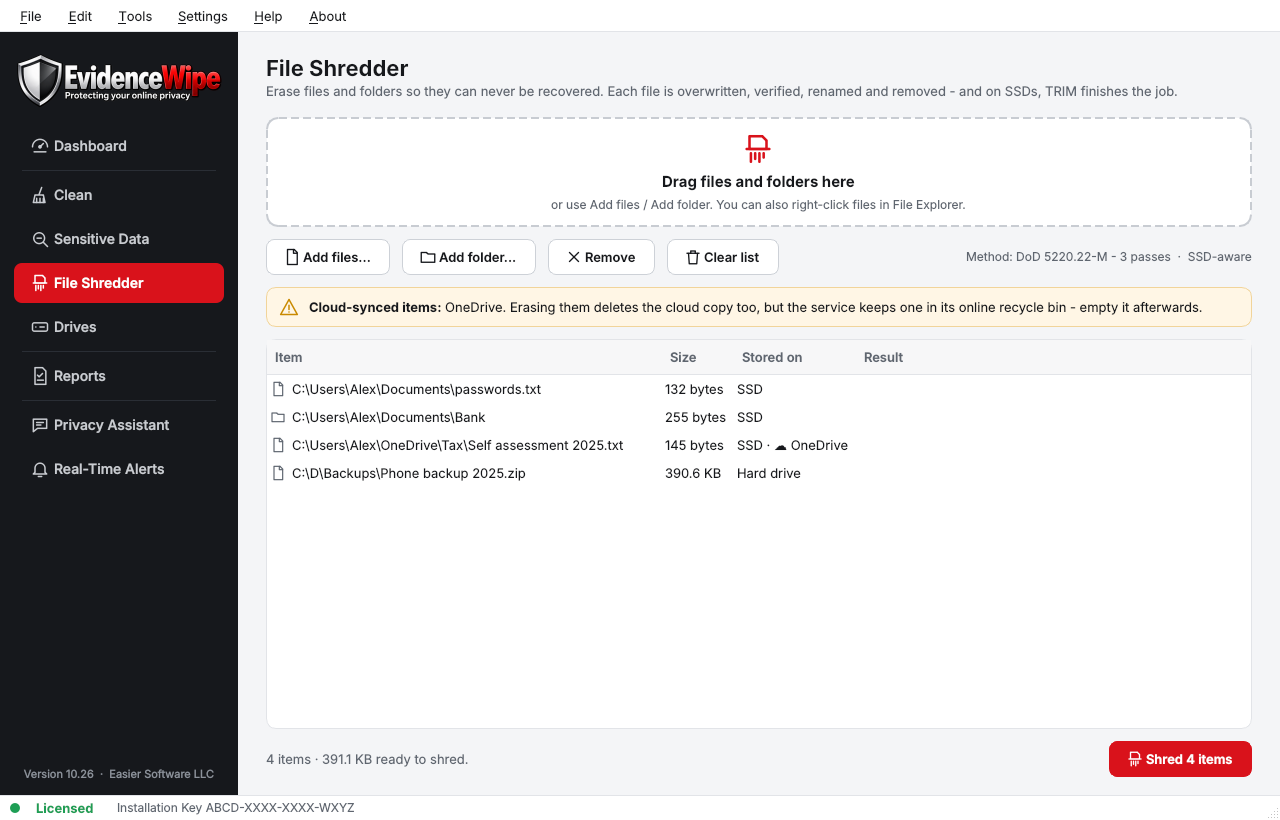
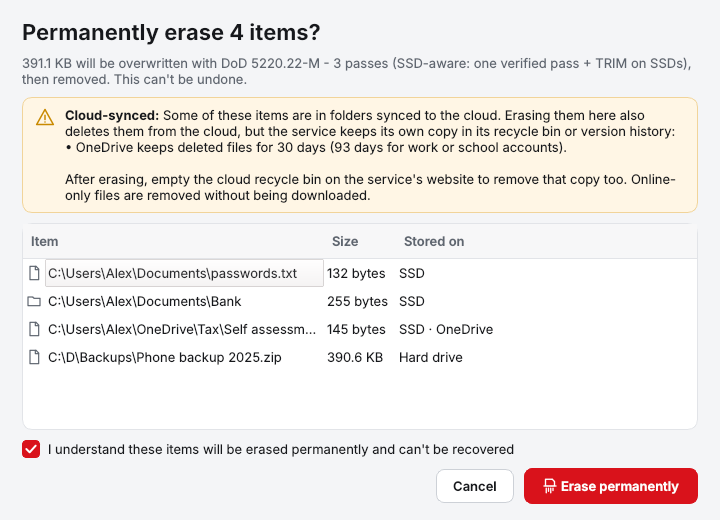
Erased items disappear from the list. Anything that couldn't be erased stays in the list with the reason (for example "The file is open in another program"), and a verification report is saved.
For your safety the shredder won't accept whole drives, the Windows folder, Program Files or your user folder itself. Shortcuts and folder links are removed without touching what they point to.
Right-Click Delete
Erase files straight from File Explorer: right-click any file or folder and choose Securely delete with Evidence Wipe.
- Turn it on with Tools › Right-Click Delete in File Explorer, or in Settings › Alerts & Explorer.
- In File Explorer, select one or more files or folders, right-click and choose Securely delete with Evidence Wipe. On Windows 11, click Show more options first.
- Evidence Wipe opens one confirmation for everything you selected. Tick the box and click Erase permanently.
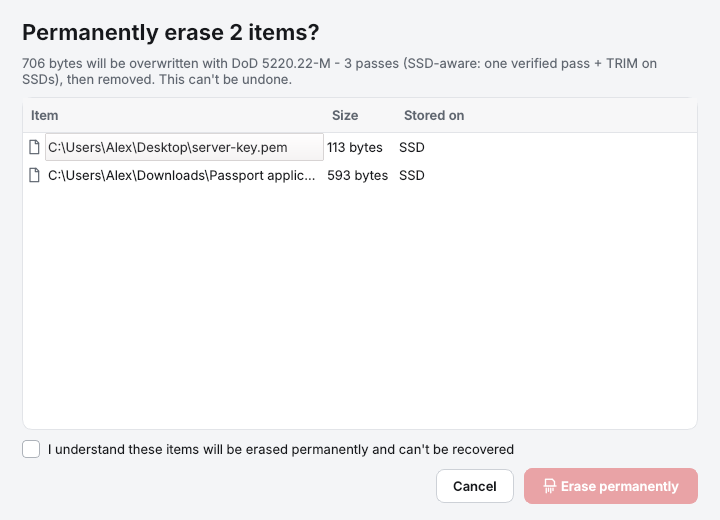
The menu is added for your Windows account only (no administrator rights needed) and is removed if you turn it off or uninstall.
Drives and free space
When you delete a file the normal way - even after emptying the Recycle Bin - its contents stay on the drive until something overwrites them. Wipe free space destroys those leftovers without touching your current files.
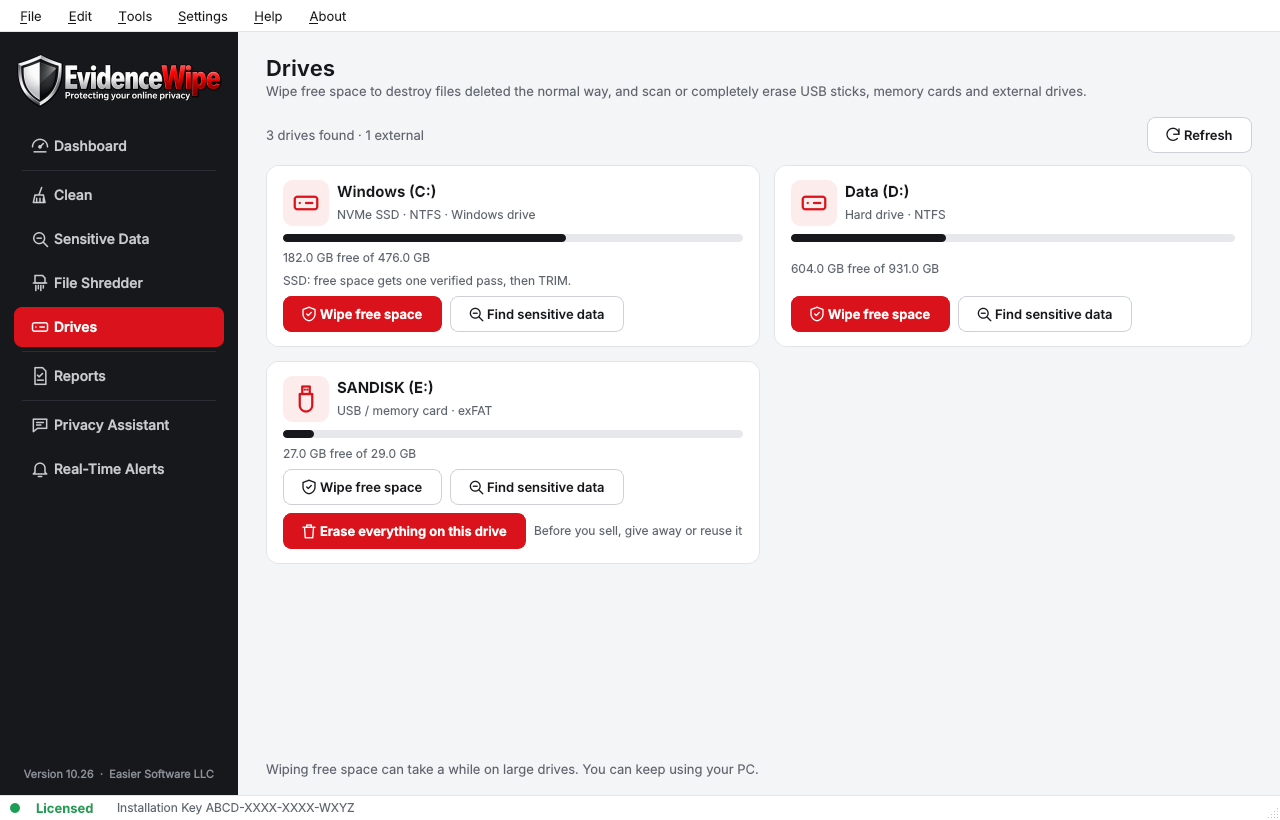
Wipe free space
- Open Drives and click Wipe free space on the drive.
- Confirm. Evidence Wipe fills the free space with overwrite data, clears small-file records, checks the result, removes its temporary files and, on SSDs, runs TRIM.
- A progress bar shows how far it's got. Stop removes the temporary files straight away.
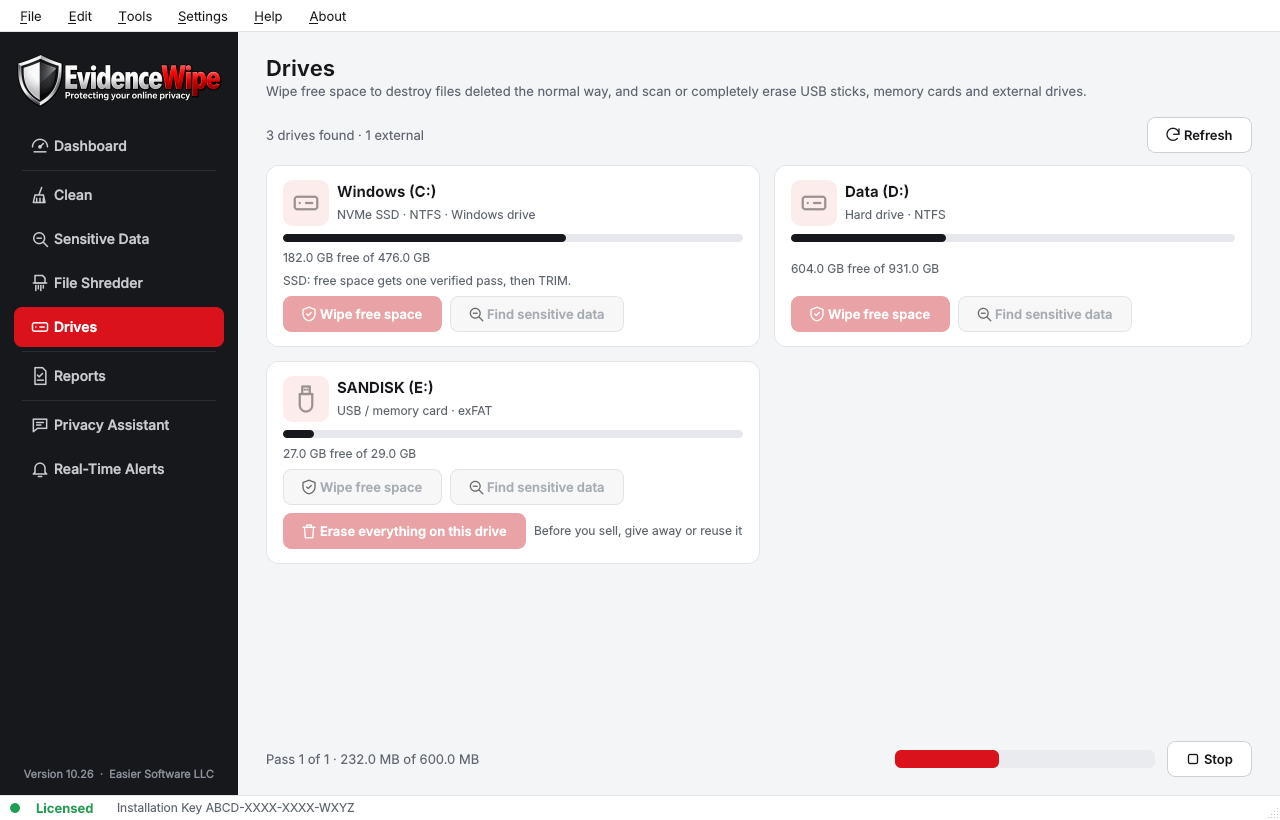
On a large drive this can take a long time. While it runs the drive briefly looks full - avoid saving large files until it finishes. The 7-pass and Gutmann methods are reduced to 3 passes for free space.
External drives
USB sticks, memory cards and external drives get extra options on the Drives page:
- Find sensitive data - runs Sensitive Data Discovery on the whole drive.
- Wipe free space - destroys files previously deleted from it.
- Erase everything on this drive - securely erases every file and folder on it, then wipes its free space. The drive stays usable and keeps its name. Ideal before you sell, give away or reuse it.
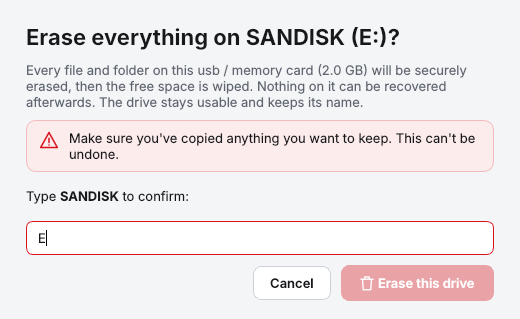
Erasing everything can't be undone. Copy anything you want to keep first. The Windows drive and internal drives can't be erased this way.
With real-time alerts on, Evidence Wipe also tells you when a drive is connected.
Erasure methods
Choose the method in Settings › Default Settings › Erasure.
| Method | Passes | When to use it |
|---|---|---|
| Quick | 1 (zeros) | Fastest. A single overwrite is what NIST 800-88 recommends for clearing modern hard drives. |
| Random data | 1 (random) | As above, with random data. |
| DoD 5220.22-M (default) | 3 | Zeros, ones, then random data. A good balance. |
| DoD 5220.22-M ECE | 7 | When a policy asks for the extended DoD sequence. |
| Gutmann | 35 | Designed for very old drives. Very slow; adds nothing on modern drives. |
With Verify the final pass on (recommended), Evidence Wipe reads the last pass back from the drive and checks it matches. The result appears in the verification report for every file.
SSD-aware erasure
SSDs don't overwrite data in place: the drive's controller writes each new pass to different memory cells. So multi-pass methods don't reach the old data on an SSD - they just add wear.
With SSD-aware erasure on (the default), Evidence Wipe recognises each drive. On an SSD or NVMe drive it uses one verified random pass, removes the file, then asks the drive to TRIM - telling the controller to discard the cells that held the old data. On a hard drive it uses the method you chose.
Running TRIM immediately needs Evidence Wipe to be started as administrator. Without that, Windows still TRIMs deleted files automatically and during its weekly drive optimisation - the report says which happened. To erase an entire SSD (for example before selling the PC), use the drive maker's Secure Erase tool or Windows' "Reset this PC › Remove everything › Clean data".
Cloud-synced folders
Evidence Wipe recognises folders kept in sync by OneDrive, Dropbox, Google Drive, iCloud Drive and Box.
- Erasing a synced file also deletes it in the cloud - but the service keeps its own copy in its online recycle bin or version history (usually 30 days; up to 93 for OneDrive work or school accounts). Evidence Wipe warns you before erasing, names the service, and adds a reminder to the report. Empty the recycle bin on the service's website to remove that copy.
- Online-only files (shown with a cloud icon in File Explorer) are removed without being downloaded first.
- Sensitive Data Discovery includes your cloud folders and marks results that are synced.
Verification Reports
After every clean, shred, free-space wipe and drive erase, Evidence Wipe saves a verification report to
Documents\Evidence Wipe Reports (you can change the folder in Settings › Reports).
Each report lists every item with its size, the number of passes, whether the final pass was verified, the drive type, the result and any notes (for example cloud reminders or items that couldn't be erased). The summary shows the method, start and finish times, the computer name (optional) and the overall status: Completed and verified, Completed with exceptions or Not completed.
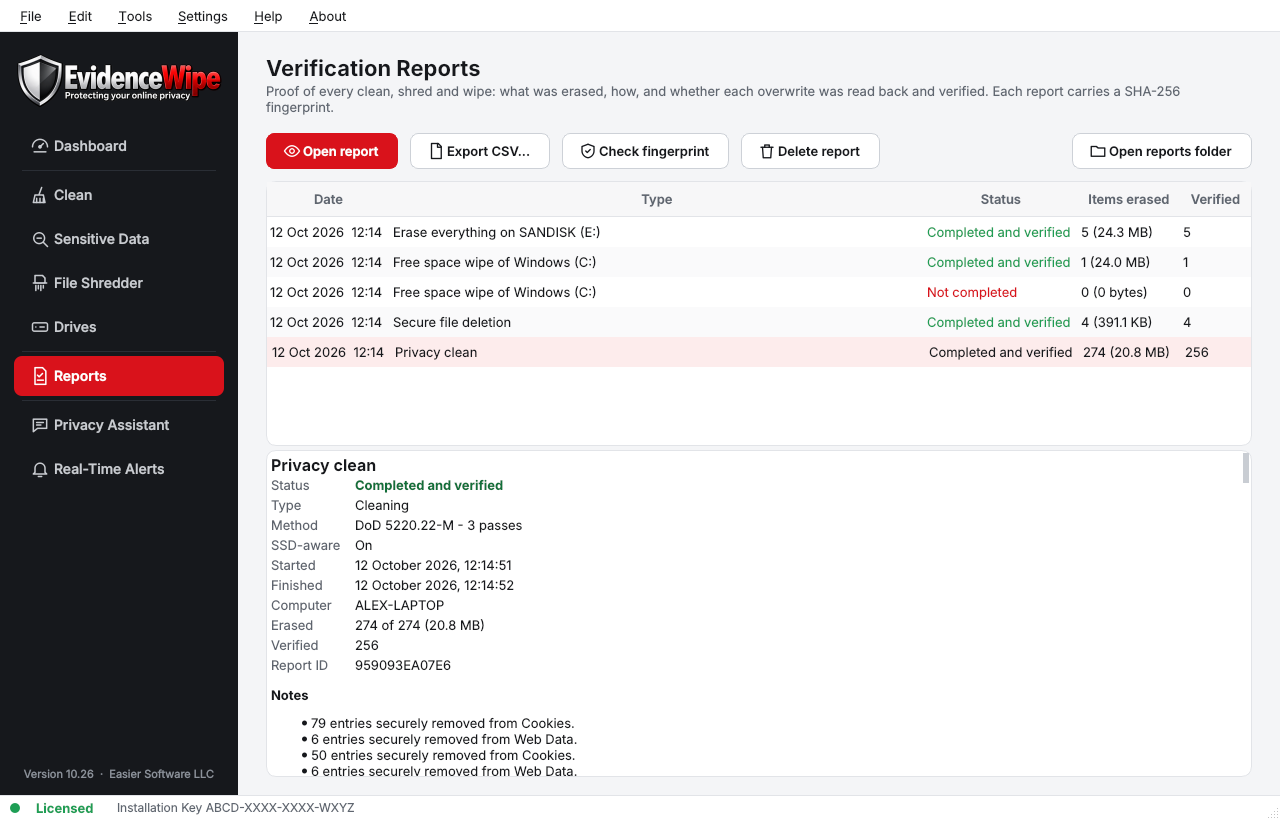
- Open report opens the printable version in your browser.
- Export CSV... saves the item list for a spreadsheet.
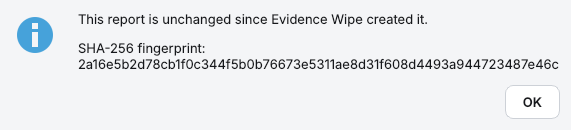
- Check fingerprint confirms the report hasn't been changed since it was created - every report carries a SHA-256 fingerprint.
Prefer not to keep file names? Tick Hide file names in reports in Settings › Reports - items are then listed by type only.
Privacy Assistant
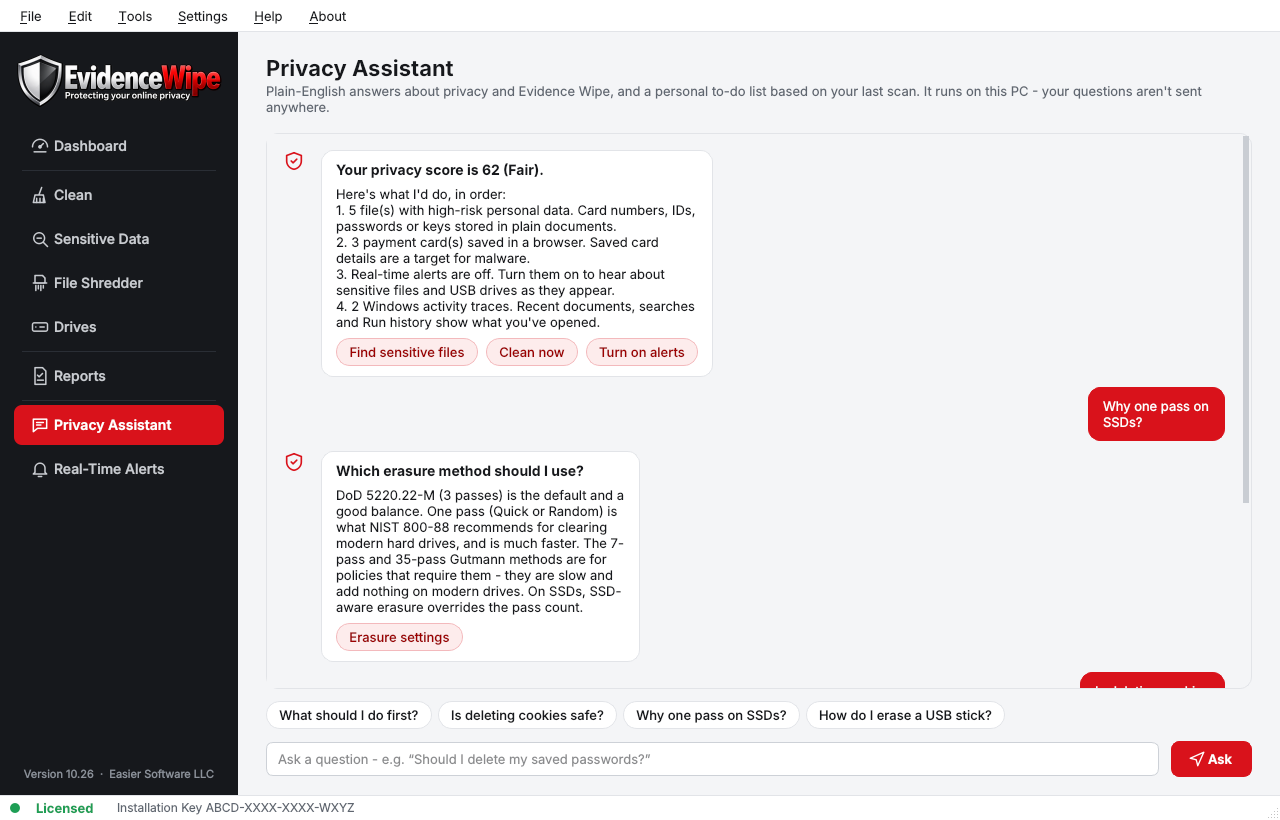
The Privacy Assistant answers questions in plain English and gives you a personal to-do list based on your last scan. It runs on your PC - your questions aren't sent anywhere.
- Ask about privacy and Evidence Wipe: "Is deleting cookies safe?", "Why one pass on SSDs?", "How do I erase a USB stick?", "What does Evidence Wipe send online?"
- Ask about your PC: "What's my score?", "How many tracking cookies do I have?"
- Answers include buttons that take you straight to the right page or setting.
Real-Time Alerts
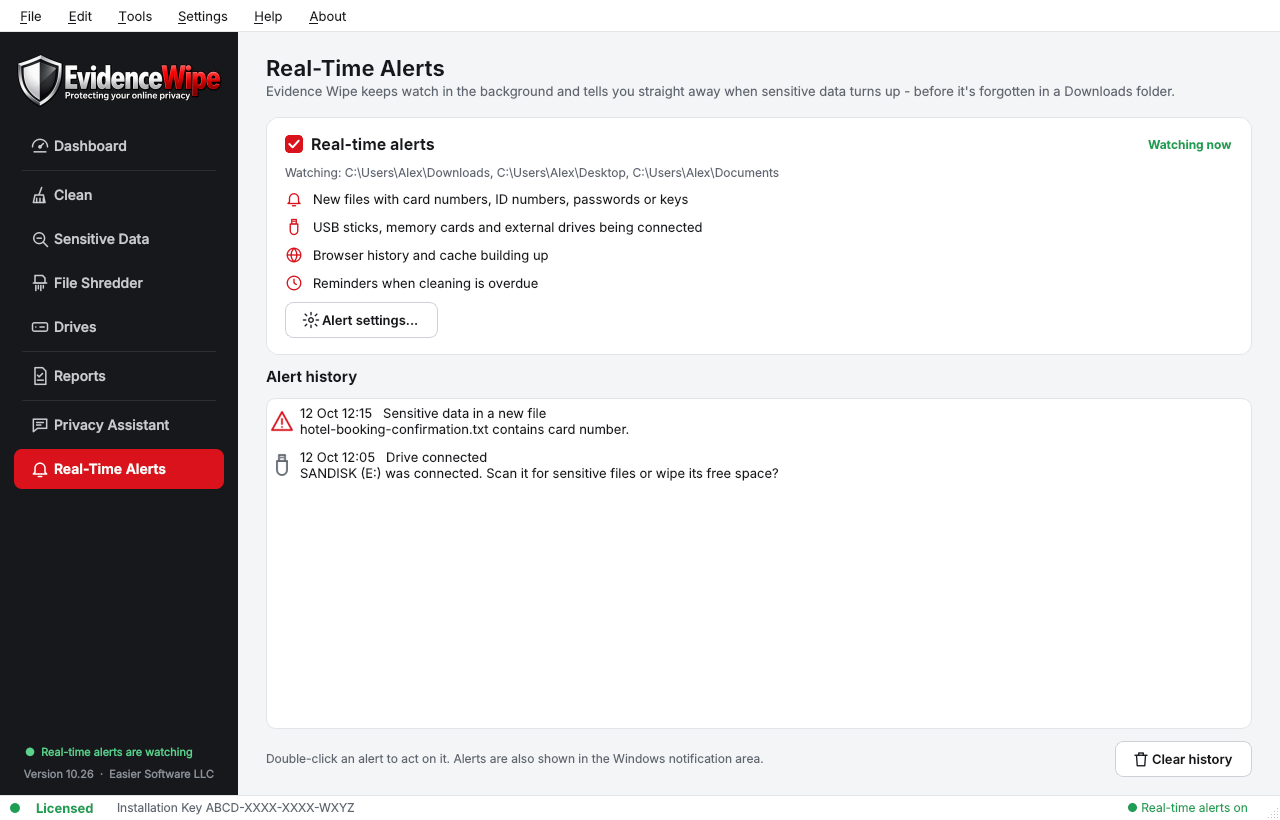
With Real-Time Alerts on, Evidence Wipe keeps watch in the background and tells you straight away when:
- a new or changed file in Downloads, Desktop or Documents contains card numbers, ID numbers, passwords or keys (checked with the same Local AI Detection);
- a USB stick, memory card or external drive is connected;
- your browser traces grow past the size you choose;
- cleaning is overdue.
Turn it on from the Real-Time Alerts page, the dashboard, or Tools › Real-Time Alerts. Alerts appear as Windows notifications and in the alert history; double-click one to act on it. Choose the folders and alert types in Settings › Alerts & Explorer.
When alerts are on and you close the window, Evidence Wipe keeps running in the notification area. Right-click its icon and choose Exit to stop it. Tick Start Evidence Wipe in the notification area when I sign in to keep watch all the time.
Scheduled cleaning
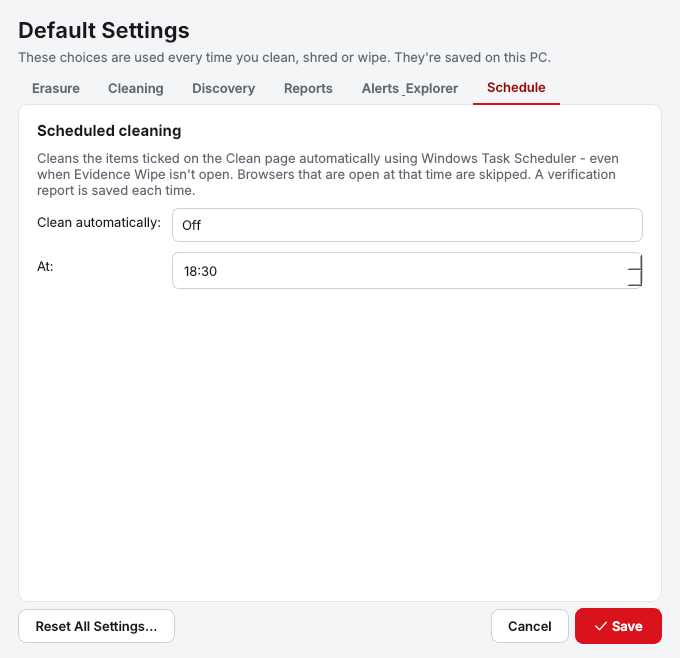
Evidence Wipe can clean automatically - every day or every week (Sunday) at a time you choose - using Windows Task Scheduler, even when Evidence Wipe isn't open. Set it in Settings › Default Settings › Schedule or Tools › Scheduled Cleaning....
A scheduled clean erases the items ticked on the Clean page. Browsers that are open at that moment are skipped, and a verification report is saved each time. Scheduled cleaning needs an activated Installation Key.
Menus
File
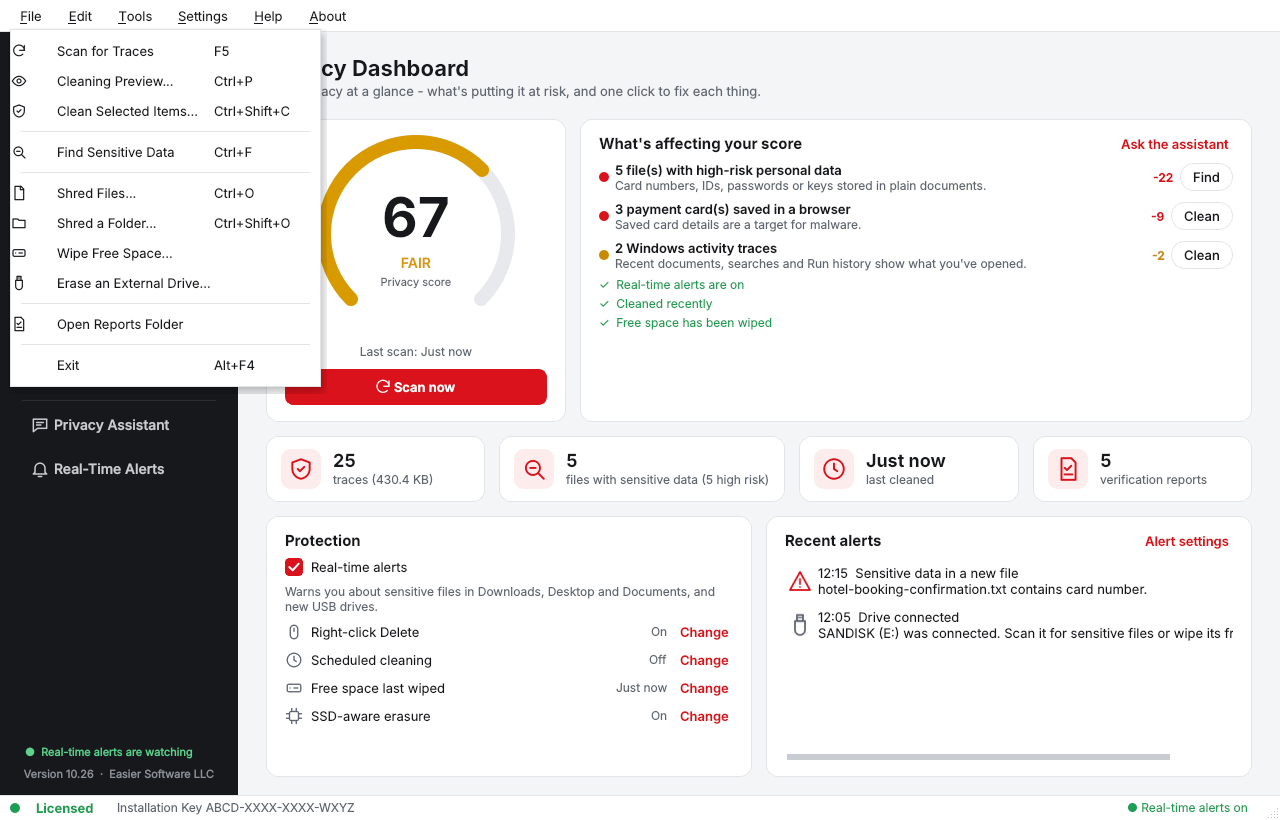
| Command | What it does |
|---|---|
| Scan for Traces (F5) | Opens Clean and scans. |
| Cleaning Preview... (Ctrl+P) | Shows what the ticked items would erase. |
| Clean Selected Items... (Ctrl+Shift+C) | Previews, then cleans the ticked items. |
| Find Sensitive Data (Ctrl+F) | Starts Sensitive Data Discovery. |
| Shred Files... / Shred a Folder... (Ctrl+O / Ctrl+Shift+O) | Adds items to the File Shredder. |
| Wipe Free Space... / Erase an External Drive... | Opens the Drives page. |
| Open Reports Folder | Opens the folder with your verification reports. |
| Exit | Closes Evidence Wipe (and stops real-time alerts). |
Edit
Select Recommended Items (Ctrl+R), Select All Items, Deselect All Items (Clean page); Remove Selected from Shred List (Delete) and Clear Shred List.
Tools
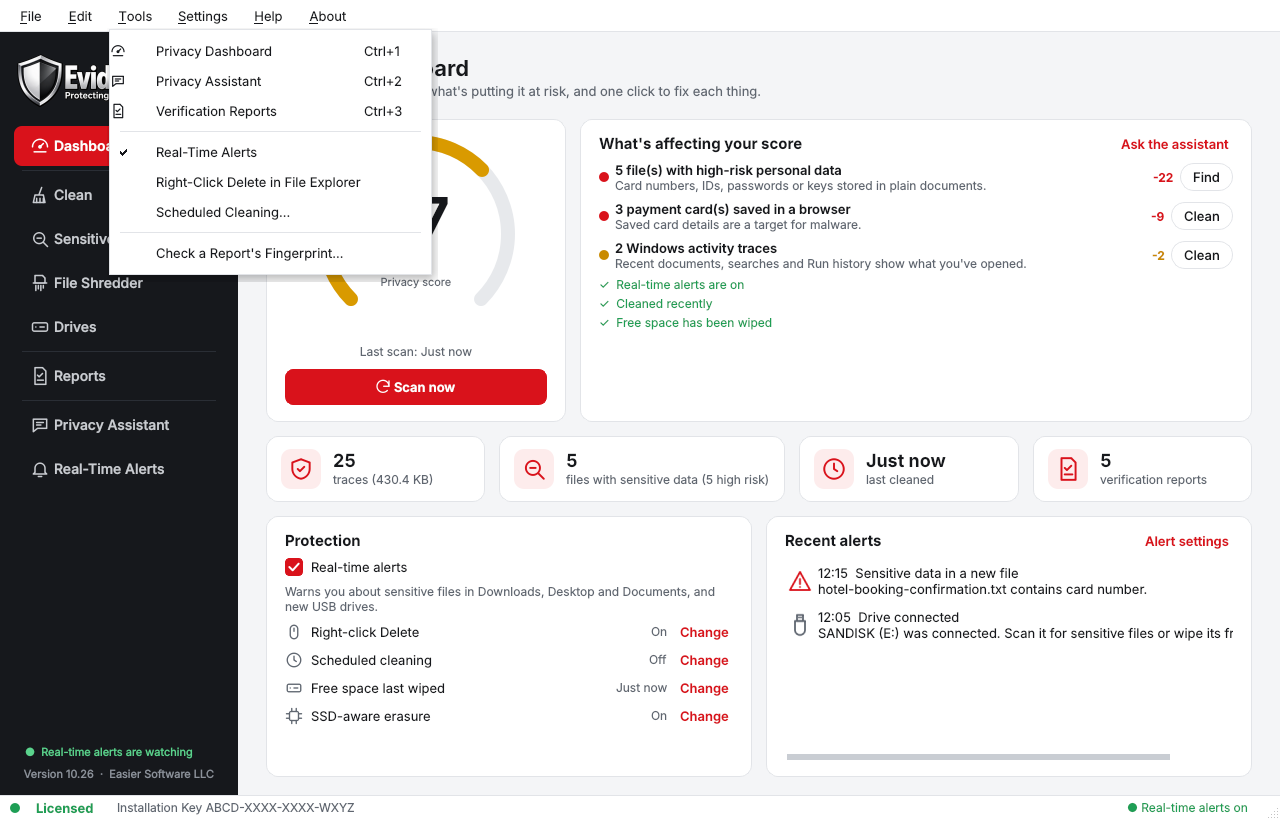
Privacy Dashboard (Ctrl+1), Privacy Assistant (Ctrl+2), Verification Reports (Ctrl+3), Real-Time Alerts (on/off), Right-Click Delete in File Explorer (on/off), Scheduled Cleaning..., Check a Report's Fingerprint....
Settings, Help and About
See Settings, License & activation, Updates and Help & support.
Settings
Open Settings › Default Settings... (Ctrl+,). Click Save to keep your changes.
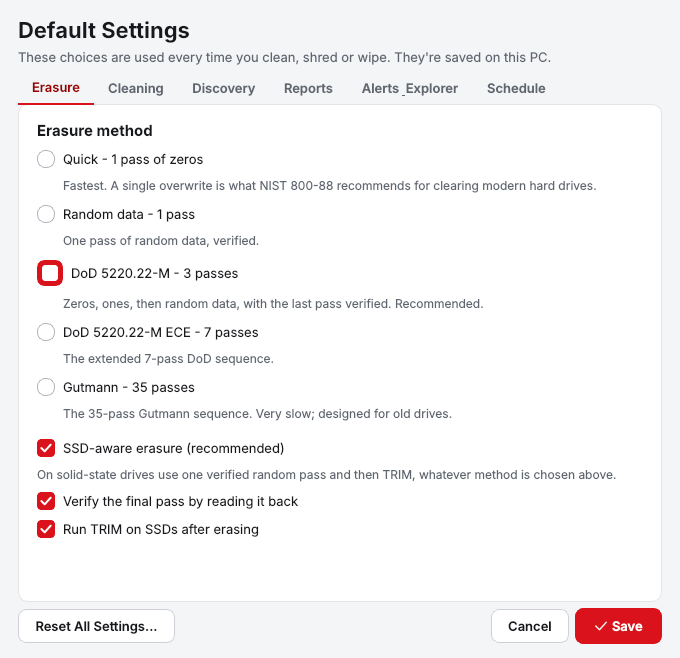
| Tab | Settings |
|---|---|
| Erasure | Erasure method; SSD-aware erasure; verify the final pass; run TRIM on SSDs. |
| Cleaning | Offer to close open browsers; warn before erasing in cloud-synced folders; don't download online-only cloud files. |
| Discovery | What to look for; minimum confidence for Local AI Detection; skip files larger than a size. |
| Reports | Save a report after every job; hide file names; include the computer name; reports folder. |
| Alerts & Explorer | Real-time alerts and their types; watched folders; keep running in the notification area; start when you sign in; the File Explorer right-click menu. |
| Schedule | Clean automatically: off, every day or every week, and the time. |
Reset all settings
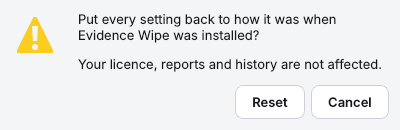
Reset All Settings... (in the Settings window or the Settings menu) puts every setting back to how it was when Evidence Wipe was installed, and removes the File Explorer menu, start-up entry and schedule. Your license, reports and history are kept.
License & activation
Your Installation Key is in your purchase email. It has 16 letters and numbers in the format XXXX-XXXX-XXXX-XXXX.
What works without a key
Scanning, the Cleaning Preview, Sensitive Data Discovery, the dashboard, the assistant, reports and real-time alerts. Erasing - cleaning, shredding, wiping free space, erasing drives and scheduled cleaning - needs an activated key.
Activate
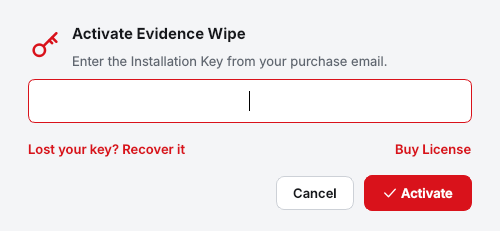
- Choose Settings › Enter Installation Key... (or click Enter Installation Key in the status bar).
- Paste your key - the dashes are added for you - and click Activate. You need to be online.
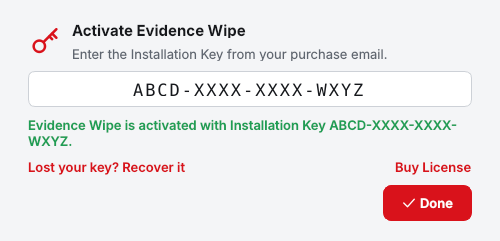
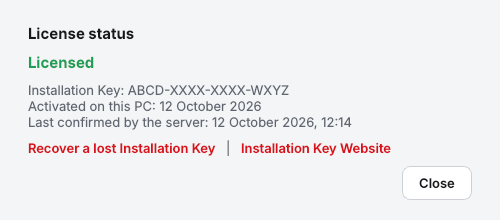
- When it's accepted, the key is shown masked: only the first and last four characters stay visible, for example
ABCD-XXXX-XXXX-WXYZ. The full key is never displayed again.
Check your license
Settings › Check License Status... asks the license server and shows the state, your masked key, when it was activated and last confirmed. Evidence Wipe also checks quietly when it starts if the last check is more than a day old. Once activated it keeps working offline for up to 7 days between checks.
| Status | Meaning |
|---|---|
| Licensed | Your key is active on this PC. Buy License options are hidden. |
| Unlicensed | No key has been entered on this PC. Buy License opens the Evidence Wipe website. |
| License Invalid | The license server said the key is no longer valid on this PC (for example it was refunded or deactivated elsewhere). Enter a valid key or contact support. |
| License check needed | The key couldn't be confirmed for more than 7 days. Connect to the internet and choose Check License Status. |
Moving to another PC
On the old PC choose Settings › Deactivate License..., then activate on the new one. If the old PC isn't available any more, contact support. Reinstalling Evidence Wipe on the same PC keeps your activation; if Windows is reinstalled or the hardware changes, simply enter your key again.
Lost your Installation Key?
Recover it yourself in a minute at installationkey.com/lookup - enter the email you bought with and your key is sent to you. Try this before contacting support. (Settings › Recover Lost Installation Key opens the page.)
Buying a license
Buy License (in the Settings menu, the About window and the status bar when unlicensed) opens the Evidence Wipe website at www.evidencewipe.com. The Installation Key website (installationkey.com) is only for managing and recovering keys.
Updates
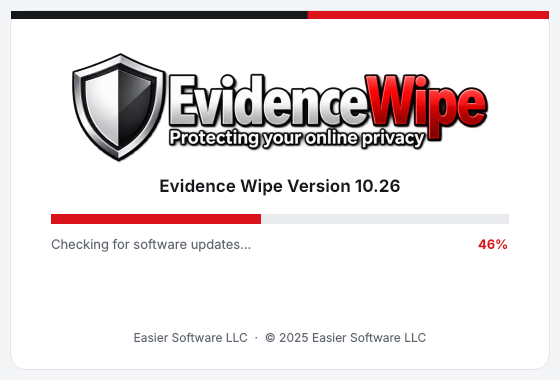
Choose About › Check for Updates.... A progress window shows Checking for software updates... while Evidence Wipe asks the website for the latest version.
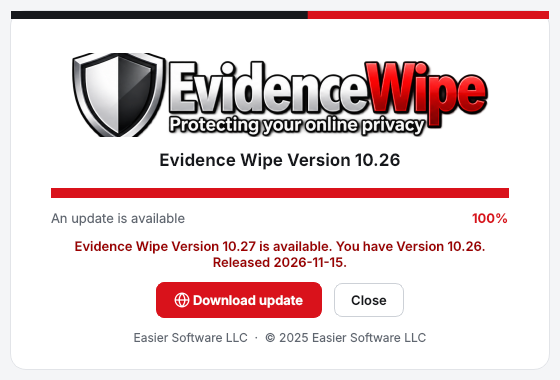
- An update is available - click Download update to get it. Updates install over the top and keep your settings, reports and activation.
- Evidence Wipe is up to date - shown only when the check really succeeded.
- The update check could not be completed - you're offline, or the website couldn't be reached. Try again later; Evidence Wipe never claims you're up to date when it couldn't check.
Help & support
| Menu | Opens |
|---|---|
| Help › User Guide (F1) | This guide. |
| Help › Contact Support | Easier Software support. |
| Help › Evidence Wipe Website | www.evidencewipe.com. |
| Help › More Applications | More software from Easier Software. |
| Help › Open Support Log Folder | The folder with Evidence Wipe's support log - useful if support asks for it. It never contains your Installation Key, card numbers or file contents. |
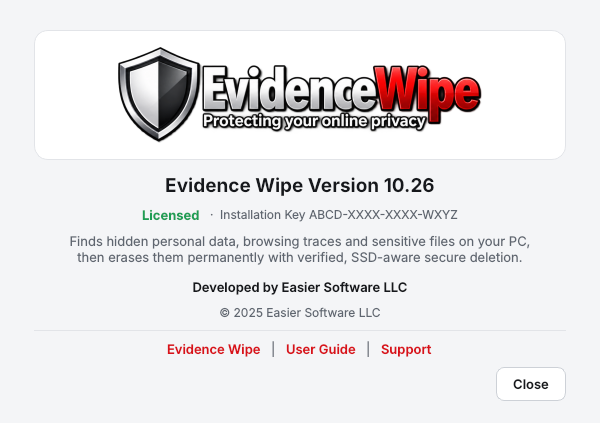
| About › About Evidence Wipe... | Version, license status and links. |
Troubleshooting
"Google Chrome is open" (or another browser)
Some items say "could not be erased"
Thumbnail cache files can't all be erased
Discovery finds a file I know is harmless
Discovery didn't look in a folder
The free-space wipe is slow
"TRIM needs administrator rights"
Right-click menu doesn't appear
I erased a synced file but it's still online
"This Installation Key was not recognised"
"Please enter the complete key - it has 16 letters and numbers"
XXXX-XXXX-XXXX-XXXX."Already active on the maximum number of PCs"
"This Installation Key is for a different product"
The status says "License Invalid"
"Could not reach the Installation Key server"
My hardware changed / I reinstalled Windows
"The update check could not be completed"
Which version do I have?
Evidence Wipe won't start
%APPDATA%\Easier Software LLC\Evidence Wipe\Logs).Still stuck?
Tell us what you were doing and what the message said.
Frequently asked questions
Can erased data be recovered?
Is there an undo?
Will I be logged out of websites?
Are my bookmarks and saved passwords safe?
Does Evidence Wipe send my data anywhere?
Is it safe for SSDs?
Can I erase the Windows drive completely?
Does it run on Windows 7 or 8?
How many PCs can I use it on?
Updating, uninstalling & policies
Updates are free - see Updates. To uninstall, open Windows Settings › Apps, find Evidence Wipe and click Uninstall.
If you're moving to another PC, deactivate first. Uninstalling removes the File Explorer menu, the start-up entry and the scheduled task.
Your reports stay in Documents\Evidence Wipe Reports; your settings are in %APPDATA%\Easier Software LLC\Evidence Wipe - delete those folders to remove them too.
